

How to Grow Herbs Indoors: A Beginner’s Guide for US Apartments
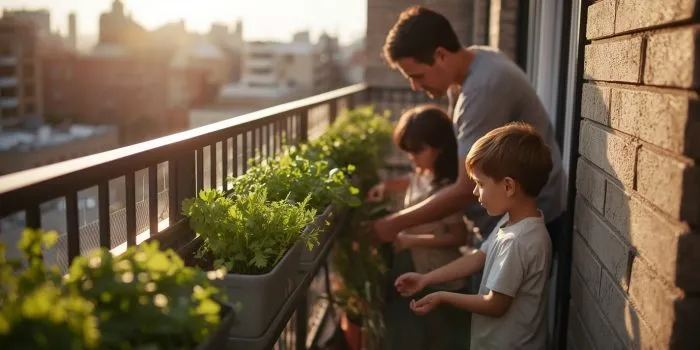
If you’ve ever dreamed of snipping fresh basil for pasta or adding a sprig of mint to iced tea without leaving your apartment, you’re in the right place. Indoor herb gardening is simple, satisfying, and—best of all—saves money while boosting flavor. In this practical guide, you’ll learn How to Grow Herbs Indoors: A Beginner’s Guide for US Apartments with easy tips you can use today.
As a bonus, you don’t need a huge windowsill or fancy gear to succeed. With a few smart choices and a little weekly care, your small space can deliver big harvests. Let’s dig in.
1) Why Indoor Herbs Are a City Cook’s Best Friend
Fresh herbs elevate everyday cooking. Basil brightens sauces, cilantro wakes up tacos, and thyme makes roasted veggies taste like they came from a bistro. Growing indoors means you always have peak flavor at your fingertips—no last-minute store runs or wilted bunches in the fridge.
Additionally, herbs are the most forgiving plants to start with. They sprout quickly, bounce back from minor mistakes, and thrive in containers. As you’ll see, How to Grow Herbs Indoors: A Beginner’s Guide for US Apartments really is as easy as following a recipe.
2) Light Made Simple: Sunbeams, Sills, and Grow Lights
Sunlight is your herbs’ main energy source. Ideally, place plants near a bright south- or west-facing window that receives 4–6 hours of direct sun. East-facing windows can work too, but growth may be slower. If your view is shaded by neighboring buildings, supplement with a small LED grow light.
Even better, modern LED panels are slim, affordable, and energy-efficient. Hang them 8–12 inches above your plants and use them for 12–14 hours daily. Because consistency matters, plug lights into a timer. This one habit keeps seedlings sturdy instead of leggy.
3) Best Herbs for Apartments (Start Here!)
Some herbs adapt to small spaces and average indoor conditions better than others. Begin with basil, mint, chives, parsley, thyme, oregano, and cilantro. They’re flavorful, fast-growing, and readily available as seeds or starter plants.
Then, once you’ve got momentum, try rosemary, sage, dill, and even compact varieties of lemongrass. For your first season, pick three to five herbs you cook with frequently. That focus keeps care simple and harvests exciting.
4) Containers & Drainage: The Non-Negotiables
Great containers make great gardens. Choose pots 4–8 inches wide with drainage holes—non-negotiable for indoor success. Without them, water pools and roots suffocate. If your favorite pot lacks holes, slip a nursery pot inside and empty the outer cachepot after watering.
As for materials, terracotta breathes and prevents soggy soil, while plastic holds moisture longer—useful in dry apartments. Add a saucer or tray to catch drips, and protect your sill or shelves with cork or felt pads.
5) Potting Mix & Feeding: Fuel for Flavor
Skip heavy garden soil; it compacts indoors. Instead, buy a high-quality potting mix labeled for containers, ideally with perlite or pumice for drainage. For culinary herbs, a blend designed for vegetables works beautifully.
Next, feed lightly. Use a balanced liquid fertilizer (e.g., 3-1-2 or 10-10-10) at half strength every 2–4 weeks during active growth. Overfeeding leads to lush, bland leaves. Since we want flavor, aim for steady but modest nutrition.
6) Watering Without Overwatering (The #1 Beginner Mistake)
Most indoor herb problems start with too much water. Before you grab the watering can, poke a finger one inch into the soil. If it feels dry, water thoroughly until it drains from the bottom. If it’s still moist, wait a day or two.
Furthermore, apartments vary wildly in humidity. In winter, heated rooms dry out fast; in summer, AC can do the same. Group pots together to raise humidity slightly, or set them on a pebble tray with water below the stones (not touching the pot).
7) Temperature & Airflow: Cozy, Not Stuffy
Happily, herbs enjoy the same temperatures you do: 65–75°F (18–24°C) by day and slightly cooler at night. Keep plants away from cold drafts in winter and out of blast zones from heaters or AC vents year-round.
Also, gentle airflow discourages disease. A small oscillating fan on low, placed several feet away, keeps leaves dry and stems strong. Think “fresh breeze,” not “wind tunnel.”
8) Seeds vs. Starter Plants: Which Should You Choose?
Starters give instant gratification. You can harvest light sprigs within a week and see growth right away. They’re ideal for basil, mint, thyme, oregano, and rosemary, especially if you’re short on patience.
Conversely, seeds cost less and offer more varieties—purple basil, slow-bolt cilantro, or compact dill. Sow a pinch of seeds in a 4–6 inch pot, keep the surface evenly moist, and thin seedlings to the strongest few. For many gardeners, using both seeds and starts is the perfect mix.
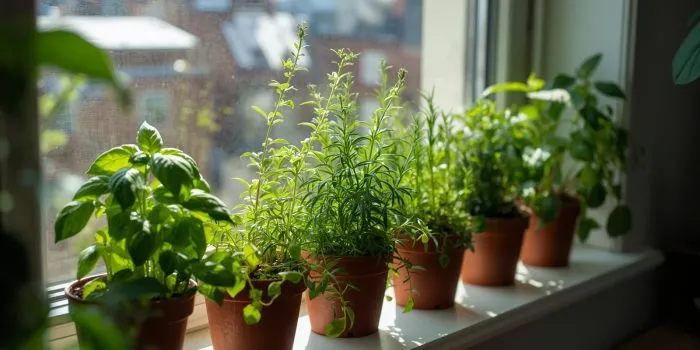
9) Space-Saving Layouts: Sills, Racks, and Vertical Tricks
Even in a studio, you can fit a mini herb haven. A sunny windowsill holds a lineup of 4-inch pots. A narrow rolling cart or tiered plant rack multiplies space without blocking light. And a wall-mounted shelf or vertical planter turns blank space into a green feature.
To maximize growth, rotate pots weekly so each side gets equal light. Additionally, place taller herbs like rosemary behind shorter ones such as chives. This simple staging prevents shade battles and keeps your mini garden photogenic.
10) Organic Pest Control: Prevention First
Ordinarily, indoor herbs attract far fewer pests than outdoor gardens. Still, it pays to inspect leaves weekly. Look for sticky residue (aphids), fine webbing (spider mites), or tiny white flyers (whiteflies). Catching issues early is half the battle.
When trouble pops up, isolate the plant. Rinse leaves in the sink, then spritz with insecticidal soap or neem oil per label directions. Repeat every 5–7 days as needed. Most importantly, avoid bringing in infested houseplants or bouquets that can hitchhike pests onto your herbs.
11) Pruning & Harvesting: The Secret to Bushy Plants
Here’s a fun rule: the more you harvest (correctly), the more your herbs grow. For basil, pinch stems just above a pair of leaves to encourage branching. For mint, parsley, and cilantro, snip outer stems first, letting the center keep growing.
Never remove more than one-third of a plant at a time. This preserves energy for regrowth and keeps flavor high. With steady pinching and light harvesting, you’ll maintain compact, productive plants for months.
12) Troubleshooting 101: Yellow Leaves, Leggy Stems, Slow Growth
Yellow leaves often mean inconsistent watering or poor drainage. Check pot holes, lighten the mix with perlite, and water only when the top inch is dry. If older leaves yellow first, consider a light feeding.
Leggy, floppy stems scream “not enough light.” Move plants closer to the window or turn on a grow light for longer stretches. Meanwhile, slow growth can stem from cool temps or too small a pot; upsize the container or relocate to a warmer spot.
13) From Pot to Plate: Quick Kitchen Uses & Fresh Storage
Use herbs the way chefs do: add tender leaves (basil, parsley, cilantro, chives) at the end of cooking for bright flavor, and add woodier herbs (rosemary, thyme, sage) earlier so they can infuse stews and roasts. Even a simple omelette or grilled cheese becomes special with a handful of chives.
For short-term storage, wrap rinsed herbs in a damp paper towel and tuck them into a resealable bag in the fridge. Basil prefers room temperature—treat it like cut flowers in a glass of water away from direct sun.
14) A 4-Week Beginner Plan (Follow This and Win)
Week 1: Pick 3–5 herbs, gather pots with drainage, buy potting mix, and place plants in your brightest window. Water thoroughly once, then wait until the top inch dries out.
Week 2: Add a timer-controlled grow light if needed. Begin a light feeding routine at half strength. Rotate pots and snip a few chives or mint leaves for your first micro-harvest.
Week 3: Prune basil tips and harvest outer parsley or cilantro stems. Check for pests and wipe leaves with a damp cloth. Consider adding a vertical shelf or pebble tray.
Week 4: Thin seedlings if you started from seed. Up-pot anything root-bound. Celebrate with a herb-forward recipe—pesto, chimichurri, or lemon-thyme roasted potatoes.
15) Budget & Starter Kit: What to Buy (and What to Skip)
You don’t need to spend much. A minimalist starter kit includes three 4–6 inch pots with saucers, one bag of all-purpose potting mix, a small bottle of liquid fertilizer, and optional LED grow light. That’s it. Skip decorative planters until you’ve had a month of success.
If you want to level up later, add a rolling cart or wall shelf, a plug-in timer, pruning snips, and a small fan. Each tool improves consistency, but your herbs will flourish with the basics.
16) Keep It Fun: Tiny Rituals That Build Big Results
Make care part of your routine. While coffee brews, rotate pots and check soil moisture. On Sundays, do a quick leaf rinse and light feeding. These tiny rituals take minutes but create thriving plants—plus a relaxing, screen-free moment in your day.
Finally, share your wins. Post a photo of your first harvest, swap cuttings with neighbors, or host a pasta night featuring your balcony basil. The joy of growing multiplies when you share it.
Final Word: You’ve Got This
Now you know How to Grow Herbs Indoors: A Beginner’s Guide for US Apartments from light and watering to pruning and cooking. Start small, stay consistent, and enjoy the flavor boost. With a sunny sill and a bit of care, your apartment will become the freshest pantry in the building.


